🛢️ Nodding-Donkey Pump Jack: step-by-step build
A slow crank rocks a long beam up and down — nod, nod, nod, all day long.
Out in the oil fields stand big machines that bow their heads up and down, day and night. People call them nodding donkeys! Inside there is no magic: a motor turns a crank round and round, a long rod pulls the back of a see-saw beam, and the front end with the "horse head" nods. Four beams joined by pins that turn circles into rocking are called a four-bar linkage. Our donkey even has a heavy counterweight wheel so the motor does not have to work so hard.
- Level 3 of 5 (medium)
- About 45 minutes
- 30 steps, 92 parts
- Powered by: Motor
- Series: Mechanical Wonders
What you will learn
- Linkages: Beams joined by pins change one motion into another.
- Worm Gear: The Lock: A worm gear turns a gear super slowly — and never slips back.
- Counterweight: A weight on the other side of a pivot that balances a load.
- Electric Circuits: Electricity flows from the battery, through the motor, and back.
- Mounting a Motor: A motor must be pinned tight, or it spins itself instead of your wheels.
- Plugging In: Power Functions: Battery box → (switch or receiver) → motor. Plugs stack like bricks.
- Frames: A frame is a ready-made strong rectangle.
- Triangles Are Strong: A triangle cannot be squished — a square can.
- Levers: A bar on a pivot multiplies your push.
Build these first
 🏗️ Worm-Gear Crane: Crank the worm gear to lift the boom — then let go. It stays up by itself! (level 3 of 5, about 30 minutes, 15 steps)
- 🔋 Motor Buggy: Your first car that drives by itself — with a forwards/backwards switch and headlights! (level 3 of 5, about 30 minutes, 20 steps)
Parts you need
- 1 × Open frame 5×11
- 30 × Black pin (grippy)
- 7 × Split pin block
- 4 × Red axle-pin
- 3 × Axle 4
- 3 × Beam 15
- 3 × Beam 7
- 10 × Half bush
- 3 × L-beam 3×5
- 4 × Blue long pin
- 1 × Pin-axle block
- 3 × Axle 5
- 1 × Yellow-hub wheel
- 4 × Bush
- 2 × Axle 8
- 1 × L-beam 2×4
- 1 × Long pin-axle block
- 1 × Beam 3
- 1 × Medium gear (24 teeth)
- 1 × Thin beam 2
- 1 × Tan axle-pin
- 1 × Beam 11
- 3 × Beam 5
- 1 × Worm gear
- 1 × M motor
- 1 × AA battery box
Steps
- Lay the white 5×11 frame flat. This is the pump jack's base.
- Push black pins up into the 4th and 6th holes of the back long side and press a split pin block onto both. Push a red axle pin into its middle cross hole, pointing out the back.
- Do the same on the front long side: two black pins, a split pin block and a red axle pin pointing out the front.
- Push black pins up into the 1st and 3rd holes of the back long side, press a split pin block on, and push a 4-long axle into its middle, pointing out the back.
- Do the same at the front: two black pins, a split pin block and a 4-long axle pointing out the front.
- Stand a 15-hole beam on the table beside each long side and press its 2nd hole onto the red axle pin. These are the tall posts — hold them upright for a moment.
- Push a black pin into the 6th hole of each tall post, pointing out. Slide a 7-hole beam onto each 4-long axle by its end hole and swing it up until its 6th hole clicks onto the pin. Post, slanted beam and base make a triangle — an A-frame that cannot wobble!
- Push a half bush onto the outer end of each 4-long axle, so the slanted beams cannot slide off.
- Walking beam: take the yellow 15-hole beam. It will rock on the posts, so it is a moving part.
- Push a black pin into the 5th hole from the front on each side and press an L-beam onto each, with the short leg pointing down. That is the horse head!
- Push two more black pins through the L-beams into the 3rd hole from the front, so the head cannot wobble.
- Push a blue long pin through the tips of the head and hang the pin-axle block on it, its cross hole pointing down. Let it swing: that keeps the pump rod hanging straight.
- Counterweight: push a 5-long axle through the back hole, with a half bush on the front tip, then a half bush and the yellow wheel behind the beam.
- Lower the walking beam from above between the tall posts. Hold a bush on each side of its middle hole (hole 8), and push the 8-long pivot axle through post, bush, beam, bush, post.
- Push a half bush onto each end of the pivot axle, against the posts, so the axle cannot creep out.
- Push black pins up into the middle hole of the base's front end and the hole next to it. Press the short leg of the black 2×4 L-beam onto both pins, lying flat, so its long leg sticks out like a diving board — this is the well head. Two pins keep it from swinging round.
- Push a half bush onto the 8-long pump rod, slide the rod down through the pin-axle block until the half bush rests on top, and push a second half bush up under the block. The rod hangs straight down above the well head, free to bob up and down.
- Crank tower: push black pins up into the 7th and 9th holes of the back long side and press a split pin block onto both.
- Hold the grey 3×5 L-beam behind the block (short leg up, on the right) and a long pin-axle block standing up in front of it. Push a 4-long axle from the back through L-beam, split pin block and the middle cross hole of the long block. Put a half bush on its back end.
- Brace the tower: push black pins into the 3rd hole of the back tall post and the middle hole of the L-beam's short leg, both pointing back. Press a 7-hole beam onto both pins. Post, L-beam and brace make a stiff triangle.
- Push black pins into the top and bottom holes of the long block, pointing right, and press a 3-hole beam onto them, standing up. Its middle hole will hold the worm axle.
- Push a 5-long crank axle through the top hole of the L-beam, with a half bush on its back end and a bush on the front, against the L-beam, so it cannot slide.
- Slide the 24-tooth gear and a bush onto the crank axle, so the gear sits right over the worm and cannot slide.
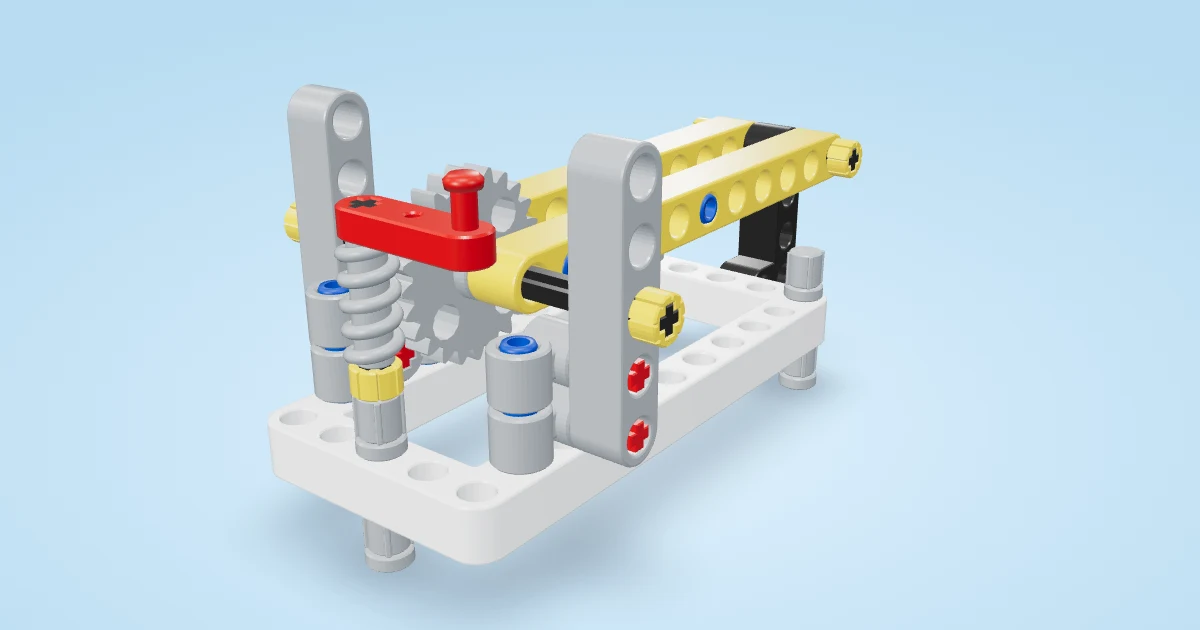
- Press the red thin 2-hole crank onto the front of the axle, pointing left. Push a tan axle-pin into its other end (the thin crank's holes are cross holes, so a round pin would not fit) and a blue long pin into the 3rd hole from the back of the walking beam, both pointing to the front. Press the 11-hole pitman arm onto them — it hangs straight down.
- Motor mount: push black pins up into the 3rd and 5th holes of the right short end and press a split pin block onto both. Push a red axle pin into its cross hole, pointing right.
- Press a 5-hole beam, standing on its edge, onto the red axle pin by its 4th hole. Hold the worm gear under the 24-tooth gear and push a 5-long axle from the right through the beam, the worm and the little standing beam.
- Push black pins into the 1st and 3rd holes of the standing beam, pointing right. Press the M motor on: the pins go into the round holes left and right of its orange cross, and the worm axle into the cross.
- Battery post: push black pins up into the 7th and 9th holes of the front long side and press a split pin block onto both. Push a red axle pin into it, pointing out the front.
- Stand a 5-hole beam on the red axle pin. Push black pins into the 5th hole of the front tall post and the 4th hole of the new beam, pointing back, and press a 5-hole brace across both: another stiff triangle.
- Push blue long pins into the 2nd and 3rd holes of the battery post, pointing to the front. Hang the AA battery box on them by the bottom two holes of its left flap — two pins, so it cannot tip. Plug the motor onto the box.
Play time
Switch it on and count the nods in one minute. Watch the pump rod bob up and down over the well. Take the counterweight wheel off — does the motor sound more tired?
Real-world inspiration
Pumpjack (beam pump) used on oil wells — https://en.wikipedia.org/wiki/Pumpjack