🏰 Castle Drawbridge: step-by-step build
Wind the handle and the heavy bridge slowly rises — and stays up when you let go.
Castles had a moat full of water and a bridge that could be pulled up when enemies came. Lifting a heavy bridge is hard work, so our castle uses a worm gear, the strongest gear trick there is. Every turn of the handle moves the big gear by just one tooth, so even small hands can lift the whole bridge. And a worm gear can't be pushed backwards, so the bridge never crashes down. Raise the bridge — the castle is safe!
- Level 2 of 5 (easy)
- About 30 minutes
- 15 steps, 49 parts
- Powered by: Hand-crank
- Series: Mechanical Wonders
What you will learn
- Worm Gear: The Lock: A worm gear turns a gear super slowly — and never slips back.
- Torque vs Speed: Slower gears are stronger gears.
- Frames: A frame is a ready-made strong rectangle.
- Pins: Grippy or Smooth: Pins join beams together — some hold tight, some let things swing.
Build these first
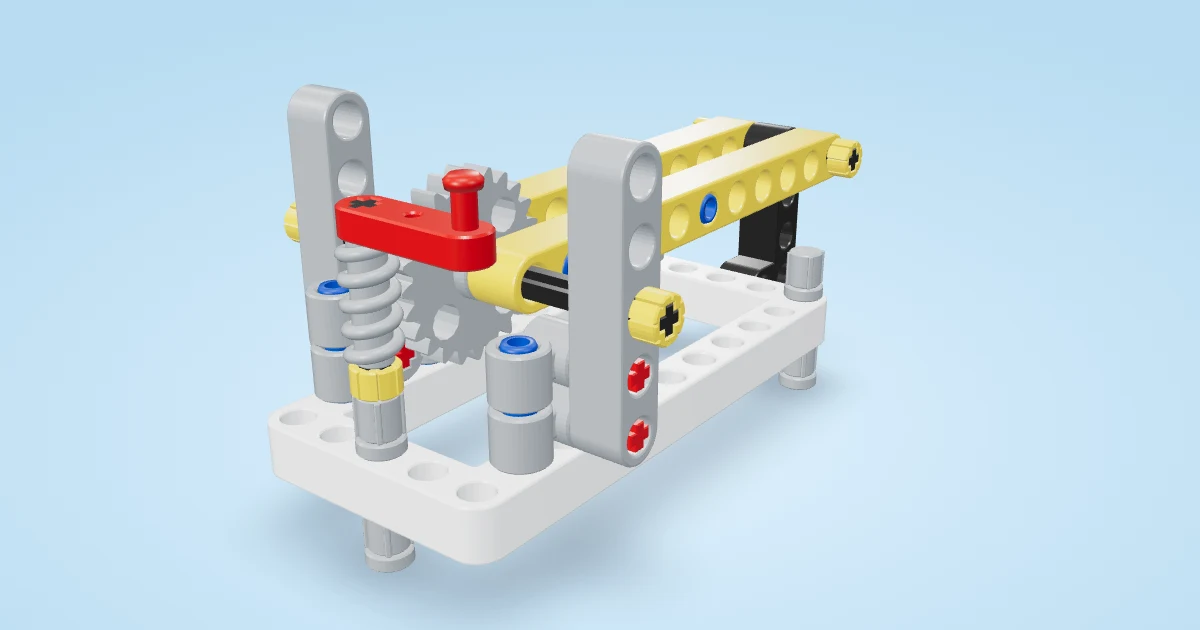 🏗️ Worm-Gear Crane: Crank the worm gear to lift the boom — then let go. It stays up by itself! (level 3 of 5, about 30 minutes, 15 steps)
Parts you need
- 1 × H frame 7×11
- 6 × Red axle-pin
- 6 × Long pin-axle block
- 16 × Black pin (grippy)
- 2 × Open frame 5×7
- 2 × Beam 7
- 4 × Bush
- 2 × Cross block
- 1 × Axle 10
- 1 × Medium gear (24 teeth)
- 1 × Open frame 5×11
- 1 × Beam 5
- 1 × Axle 4
- 2 × Half bush
- 1 × Axle 8
- 1 × Worm gear
- 1 × Hand crank
Steps
- Lay the H-frame flat. This is the castle floor. Push red axle-pins up into the 1st and 5th holes of the back cross bar.
- Slide a long pin-axle block onto each red pin. Push black pins into both side holes of the left block, sticking out towards the back.
- Stand a 5×7 frame at the back and press its bottom holes onto the two pins. Push two more black pins through its bottom holes into the right block. This is the back tower.
- Hold a 7-hole wall-walk beam against the top of the tower, inside, and push two black pins through the tower into it.
- Front tower base: push red axle-pins up into the 1st and 5th holes of the front cross bar.
- Slide a long pin-axle block onto each red pin and push black pins into both side holes of the left block, sticking out towards the front.
- Press the front tower onto the two pins and push two black pins through it into the right block. Push a red axle-pin into the 3rd top hole of the tower from the inside, axle end sticking out to the front.
- Hold the second wall-walk beam against the top of the front tower, inside, and push two black pins through into it. A second red axle-pin goes into the 5th top hole, like the first.
- Hold a bush and two cross blocks in a row between the towers, then push the 10-long hinge axle from the back through the 2nd hole of the back tower, the bush, both cross blocks and the front tower.
- Lock the axle: a bush on the back end, and on the front end the 24-tooth gear with a bush after it.
- Push two black pins down into the cross blocks and lay the bridge deck on them.
- Push two black pins down into the corner holes at the far end of the deck and press a 5-hole beam onto them: the bridge's foot on the other side of the moat.
- Worm bearings: press a long pin-axle block, standing up, onto each red axle-pin by its middle cross hole. Push a 4-long axle through both top holes, with a half bush on its left end.
- Slide a bush and the worm gear onto an 8-long axle and push it through the bottom holes of both blocks (round holes: the shaft turns in them), so the worm sits right on top of the 24-tooth gear. Lock the top axle with a half bush on its right end.
- Put the red crank on the end of the worm shaft.
Play time
Crank the bridge up and let go halfway: does it fall? Try pushing the bridge down with your finger. Count how many turns it takes to raise the bridge all the way.
Real-world inspiration
Bascule bridges and castle drawbridges — https://en.wikipedia.org/wiki/Drawbridge